

Picture this: You’re standing in the skincare aisle, squinting at a wall of products promising “radiant, glowing skin.” The price tags make you wince, and the ingredient lists read like a chemistry textbook. You can’t pronounce half of them, and you’re not entirely sure what they do.
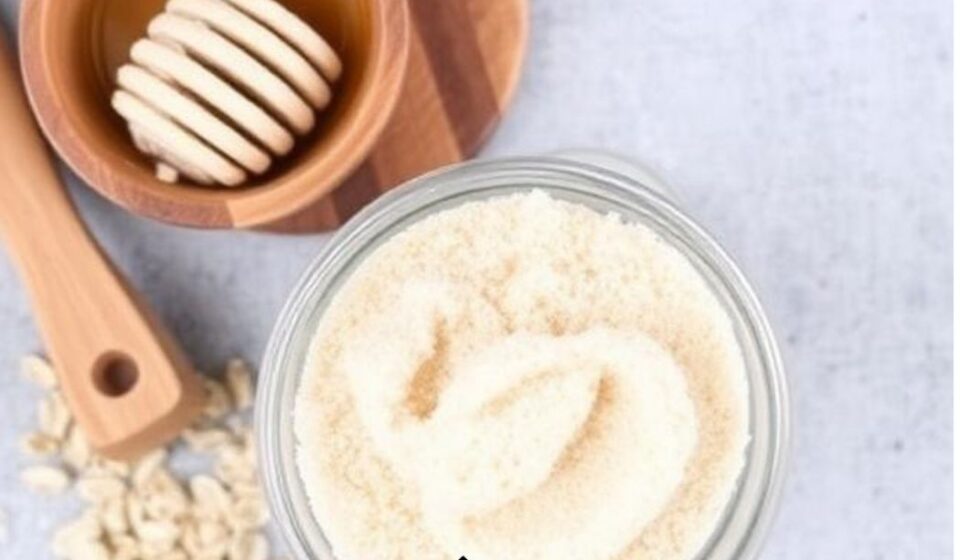
Now, imagine a different scenario. You walk into your kitchen, open the pantry, and find everything you need for a spa-quality facial exfoliator. Oats, honey, sugar, and coffee—these aren’t just for breakfast anymore. They’re the keys to a brighter, smoother complexion, and they cost pennies compared to those fancy jars.
This isn’t just about saving money. It’s about taking control. When you make your own face scrub, you know exactly what’s going on your skin. You avoid harsh preservatives, artificial fragrances, and those tiny plastic microbeads that are devastating our oceans. You get to customize the experience, tailoring it to your skin’s unique needs on any given day.
Here, I will guide you through the art and science of creating the perfect DIY exfoliator for face care. Whether you’re a complete beginner or a seasoned skincare enthusiast, this guide will help you unlock the power of natural ingredients to achieve the healthy, glowing skin you deserve.
Table of Contents
ToggleBackground: Why Exfoliation is Non-Negotiable
To understand why exfoliation is essential, let’s talk about your skin’s natural life cycle. Your skin is constantly renewing itself, producing new cells at the deeper layers and pushing older ones to the surface. These dead skin cells are supposed to shed on their own. But sometimes, they overstay their welcome.
Factors like age, sun exposure, and simply not taking care of your skin can slow down this shedding process. The result? A buildup of dull, flaky cells that sit on the surface of your skin. This is what causes your complexion to look tired, dry, and lackluster. It can also clog pores, leading to blackheads, whiteheads, and breakouts.
This is where exfoliation comes in. It’s the gentle (or sometimes not-so-gentle) process of removing that dead cell buildup to reveal the fresh, healthy skin underneath. Regular exfoliation is a game-changer for several reasons:
-
It instantly brightens your complexion by removing the dull layer.
-
It prevents breakouts by keeping pores clear.
-
It allows your serums and moisturizers to penetrate deeper, making them far more effective.
-
It smooths your skin’s texture, making makeup application a breeze.
-
Over time, it can stimulate collagen production, helping to reduce the appearance of fine lines and wrinkles.
The DIY Difference: Why Make Your Own Exfoliator?
In the world of skincare, the simplest solutions are often the most profound. An exfoliator for face done DIY-style isn’t a new trend; it’s a return to a time-honored tradition of using natural, whole ingredients for beauty. So, why are people—and your skin—flocking to it?
1. You Control the Ingredients
When you look at the label of a commercial scrub, you’ll often see a long list of synthetic chemicals, preservatives, and artificial fragrances. When you make your own, the ingredient list is as short and sweet as “honey, oats, and yogurt.” You are in total control.
2. It’s Highly Customizable
This is where the DIY approach truly shines. Your skin isn’t the same every day. Maybe it’s feeling extra dry in the winter, or a bit oily in the summer. When you have your pantry ingredients, you can adapt. A commercial product is one-size-fits-all; a DIY exfoliator for face is tailored just for you.
3. It’s Sustainable and Eco-Friendly
Many store-bought scrubs contain plastic microbeads. These tiny particles aren’t filtered out by water treatment plants and end up in our rivers and oceans, harming marine life. By using natural alternatives like sugar, salt, or coffee grounds, you’re making a choice that’s better for the planet.
4. It’s Incredibly Cost-Effective
Let’s be real. A jar of quality face scrub can cost a significant amount. A DIY version uses ingredients you likely already have in your kitchen. It’s a fraction of the cost, and you can make only as much as you need, reducing waste.
The Foundation: Understanding Exfoliant Types
Before you start mixing, it’s important to understand the two main types of exfoliation. Most DIY scrubs use physical exfoliation, but many ingredients offer chemical benefits too.
Physical Exfoliants
These are the “scrubbies.” They are particles that physically slough off dead skin cells through gentle friction. In your kitchen, these include sugar, salt, coffee grounds, oatmeal, and rice flour. The key is the size and shape of the particle. A coarse sugar is great for the body but may be too abrasive for the delicate facial skin, where fine brown sugar or ground oats are preferable.
Chemical Exfoliants (The Natural Kind)
This isn’t about harsh lab-made acids. Natural chemical exfoliants use enzymes and gentle acids from food to dissolve the bonds holding dead skin cells together. Think of yogurt (lactic acid), lemon juice (citric acid), and papaya (papain enzyme). They work on a microscopic level, and many DIY recipes combine a physical scrubbing agent with a natural chemical agent for a one-two punch of radiance.
Main In-Depth Sections: DIY Exfoliator Recipes for Every Skin Type
Now, we get to the good part. Here are my top recipes for a DIY exfoliator for face, carefully categorized by your skin’s needs. These aren’t just random combinations; they are power-packed remedies designed for real results.
A Quick Note on Preparation:
Before applying any DIY face scrub, start with a clean face. Use a gentle cleanser to remove makeup and daily grime. Some people like to steam their face for a few minutes to open up pores, making it easier to dislodge dirt and dead cells . Always apply the scrub to a damp face to help the particles glide smoothly and prevent micro-tears.
For Dull, Dry, and Dehydrated Skin: Nourishing Moisture
The goal here is to remove flaky dead skin while flooding the fresh new skin with hydration. You want to avoid any ingredients that will strip your skin of its natural oils.
Recipe 1: The Oatmeal & Honey Soother
This is arguably the most gentle and effective DIY exfoliator for face in this category. Oatmeal is a superstar for dry skin. It’s a natural humectant (draws moisture in), and it has saponins that gently cleanse without stripping. Honey is pure “liquid gold,” drawing moisture from the air into your skin. It’s also antibacterial and soothes irritation. Colloidal oatmeal, which you can make by grinding regular oats, is especially fine and gentle.
-
Ingredients: 2 tablespoons of finely ground oats (use a blender or food processor), 1 tablespoon of raw honey, and a splash of warm water or milk.
-
Instructions: Mix all ingredients to form a paste. Apply to your face in gentle circular motions for 1-2 minutes. You can also leave this on as a soothing mask for 5-10 minutes. Rinse with warm water and pat dry.
Recipe 2: The Sugar & Olive Oil Brightener
This is a classic for a reason. Brown sugar has finer granules than white sugar, making it a gentler physical exfoliant. Olive oil is rich in healthy fats and antioxidants that deeply nourish and soften the skin.
-
Ingredients: 1 tablespoon of brown sugar, 1 tablespoon of extra virgin olive oil.
-
Instructions: Mix into a paste. Gently massage onto damp skin in circular motions. Focus on any areas that feel extra rough. Rinse thoroughly with lukewarm water.
For Oily and Acne-Prone Skin: Balance and Purify
The goal is to clear pores without over-stimulating oil production (which can backfire and make things worse). You need ingredients that are astringent and anti-bacterial but not overly harsh.
Recipe 3: The Lemon & Sugar Clarifier
This scrub is a powerhouse for oily skin. Lemon juice is a natural astringent and has mild bleaching properties that can help lighten acne scars. It also contains citric acid, a mild AHA that exfoliates chemically. Sugar provides the physical scrub to unclog pores.
-
Ingredients: 1 tablespoon of granulated sugar, 1 teaspoon of fresh lemon juice, ½ teaspoon of honey (optional, to balance the acidity).
-
Instructions: Mix into a paste. Because lemon can be potent, apply gently and don’t leave it on too long. Rinse thoroughly with cool water after 1-2 minutes.
-
Important: Lemon juice makes your skin photosensitive, meaning it’s more susceptible to sun damage. Always, and I mean always, follow up with a good sunscreen if you use this scrub in the morning.
Recipe 4: The Yoghurt & Rice Flour Refiner
This is a delightful, gentle option. Yogurt contains lactic acid, which is a superstar for gently dissolving dead skin cells without irritation. It also has probiotics that can balance your skin’s microbiome. Rice flour is a fine, non-abrasive powder that absorbs excess oil without stripping the skin.
-
Ingredients: 1 tablespoon of plain, unsweetened yogurt, 1 teaspoon of rice flour (if you don’t have rice flour, you can grind rice in a blender until it’s a powder).
-
Instructions: Mix well and massage onto your face in circular motions for 1-2 minutes. Rinse with lukewarm water. This is also excellent for sensitive skin.
For Combination Skin: The Best of Both Worlds
Combination skin can be tricky. The T-zone (forehead, nose, chin) is oily, while the cheeks might be normal or dry. The key is to use a scrub that balances these areas without being overly harsh on the dry spots or too gentle on the oily ones.
Recipe 5: The Coffee & Coconut Oil Energizer
Coffee grounds are slightly textured and excellent for absorbing excess oil and brightening dull skin. The caffeine can also temporarily reduce puffiness. Coconut oil is hydrating for dry areas, though those with very oily skin might want to use it sparingly on the T-zone or swap it for a lighter oil like jojoba.
-
Ingredients: 1 tablespoon of used coffee grounds (make sure they are dry to prevent the scrub from spoiling quickly), 1 tablespoon of coconut oil (melted).
-
Instructions: Combine and gently massage onto your face, focusing on the T-zone. Rinse with warm water. Your skin will feel instantly refreshed.
Recipe 6: The Gram Flour (Besan) & Turmeric Glow
This is a beloved traditional recipe, and for good reason. YouTuber and actress Prajakta Koli swears by this very scrub for her glowing skin. “Besan (gram flour), haldi (turmeric), dahi (yoghurt), and honey. Just make a paste and put it on your face,” she says.
-
Ingredients: 1 tablespoon of besan (gram flour), ½ teaspoon of turmeric, 1 tablespoon of yogurt, 1 teaspoon of honey.
-
Instructions: Mix into a smooth paste. Apply evenly to your face and neck, leave on for about 15-20 minutes, and rinse gently with lukewarm water while massaging in circular motions. Besan is excellent for oil control and exfoliation, while turmeric provides anti-inflammatory benefits.
For Sensitive Skin: Ultra-Gentle Calming
If your skin reacts to almost everything, this is your zone. Your scrub needs to be as gentle as possible. Harsh abrasives like salt or walnut shells are a strict no-go, as they can cause micro-tears.
Recipe 7: The Rose and Oats Comfort Scrub
Rose is known for its calming, anti-inflammatory properties. Oats are deeply soothing and moisturizing, as discussed earlier. This recipe creates a creamy, non-abrasive mask that gently polishes the skin.
-
Ingredients: 4 teaspoons of dried rose petals, 4 teaspoons of rolled oats (ground together into a fine powder), 1 teaspoon of kaolin clay (or bentonite clay for oilier sensitive skin), 1 teaspoon of raw honey, 1 teaspoon of a gentle oil like jojoba or olive oil.
-
Instructions: Mix all dry ingredients, then add honey and oil to form a paste. Gently massage onto your face for 30-60 seconds and rinse.
Common Mistakes and Challenges + Solutions
The world of DIY skincare is wonderful, but it is a place where it’s possible to make mistakes. Let’s troubleshoot the most common issues.
Mistake #1: Over-Exfoliation
This is the number one mistake. Your skin needs time to renew itself. Using a scrub every day will strip your skin of its protective barrier, leading to irritation, redness, and breakouts. The Solution: Limit exfoliation to 1-2 times a week, regardless of your skin type . Listen to your skin. If it feels tight, stingy, or looks red, you’re doing it too often.
Mistake #2: Being Too Harsh
Scrubbing like you’re trying to scour a pan is a recipe for disaster. The skin on your face is delicate. Applying too much pressure can cause micro-tears, making your skin vulnerable to bacteria and infection. The Solution: Gentle, circular motions are your best friend. Let the ingredients do the work for you.
Mistake #3: Using the Wrong Ingredients
Your facial skin is not the same as the skin on your body. Ingredients like coarse sea salt, ground nutshells, or crushed apricot pits can be too abrasive for your face. The Solution: Opt for fine, gentle particles. Brown sugar, ground oats, and rice flour are all much kinder choices.
Mistake #4: Applying to Broken Skin or Active Breakouts
Scrubbing a pimple or a scratch will only make it angrier and spread bacteria. The Solution: Avoid active breakouts or any areas of broken skin. You can exfoliate around them. For acne-prone skin, chemical exfoliants like yogurt are a better choice than physical ones that can irritate the blemish.
Mistake #5: Ignoring Shelf Life
Because your homemade scrub lacks preservatives, it won’t last for months on a shelf. It can become a breeding ground for bacteria. The Solution: Make only as much as you need for one or two uses. If you do have leftovers, they can be stored in the refrigerator for up to a week. If it smells off or changes color, toss it out.
Pros, Cons, and Balanced Analysis: The Big Picture
Let’s be objective. While DIY exfoliators have a lot of positives, there are some drawbacks to be aware of compared to store-bought products.
| Pros of DIY Exfoliators | Cons of DIY Exfoliators |
|---|---|
| ✅ Total Ingredient Control: You know exactly what’s going on your face. No mystery chemicals. | ❌ Shorter Shelf Life: They spoil faster. You need to use them within a week and often have to make them fresh each time. |
| ✅ Highly Customizable: You can tailor the recipe to your skin’s needs on any given day. | ❌ Less Convenient: Mixing up a scrub in the kitchen takes extra time compared to grabbing a tube from the shelf. |
| ✅ Cost-Effective: Uses inexpensive pantry staples. | ❌ No Preservatives: While this is a pro for many, it also means you are relying on the freshness of the ingredients and your hygiene to prevent bacterial growth. |
| ✅ Sustainable & Eco-Friendly: No plastic packaging or microbeads. | ❌ Less Consistent Results: Because you’re not using a lab-tested formula, the consistency and effects can vary. |
| ✅ No Harsh Chemicals: Free from parabens, sulfates, and synthetic fragrances. | ❌ Messy: Let’s be real, kitchen scrubs can be a bit more drippy and messy to deal with. |
The Verdict: For the vast majority, the pros of a DIY exfoliator for face massively outweigh the cons. The ability to customize, save money, and know exactly what you’re using is empowering. A little planning and prep time can easily overcome the inconvenience factor.
Future Trends and Predictions
The world of skincare is cyclical. We’ve moved from ancient natural remedies to synthetic chemicals, and now we are returning, with a more sophisticated understanding, to the power of nature. Here is what I see for the future.
The Rise of “Clean” Science
People are becoming more curious about why things work. The future of DIY skincare isn’t just mixing random things together; it’s about understanding the science behind the ingredients. People are learning about the action of lactic acid in yogurt, the antioxidant properties of coffee, and the moisture-attracting power of honey. This isn’t just a trend; it’s an education.
Eco-Consciousness Driving the Market
As the world becomes more aware of environmental issues, the push away from plastic microbeads and synthetic ingredients will intensify. This will naturally drive more people toward sustainable, zero-waste solutions found right in their own homes.
Hyper-Personalization
We are entering an era of hyper-personalized skincare, and DIY is the ultimate expression of it. Future trends will involve people blending their own “base” products—like a gentle face wash or a hydrating serum—and then adding specific natural exfoliants depending on how their skin feels that day. Think of your kitchen as the “skin bar” where you mix up a custom cocktail every time.
From the Pantry to the Pot: A More Advanced DIY
We are already seeing this. Websites like The Soapery are teaching people to create actual emulsions and creams using ingredients like emulsifying wax, colloidal oatmeal, and pH testing to create a stable, luxurious product. This bridges the gap between a simple kitchen scrub and a professional product, offering the best of both worlds.
Key Takeaways: Your Quick Summary
-
Exfoliation is essential: It removes dead skin cells, revealing brighter, smoother skin and preventing breakouts.
-
Less is more: For facial skin, exfoliate 1-2 times a week to avoid irritation.
-
Gentle is the name of the game: Use fine, non-abrasive particles like brown sugar, ground oats, or rice flour. Avoid salt or nutshells on your face.
-
Match it to your skin type: Dry skin needs honey and oatmeal. Oily skin benefits from lemon and yogurt. Sensitive skin requires the utmost gentleness.
-
Don’t skip the patch test: Always test a new scrub on a small area of your inner arm before applying it to your face.
-
Moisturize after: Exfoliation can leave your skin feeling a bit stripped. Always follow up with a good moisturizer to lock in hydration.
-
Wear sunscreen: Chemical exfoliants like lemon juice and lactic acid increase your skin’s sensitivity to the sun. Always wear SPF.
-
Fresh is best: Make only what you need and discard leftovers after a week.
Conclusion
A homemade exfoliator for face is more than just a beauty treatment; it’s an act of self-care and a commitment to a simpler, more mindful way of living. It’s a way to connect with your body and the natural world, using the bounty of the earth to nurture your skin. By taking matters into your own hands, you avoid the pitfalls of overpriced, chemically-laden products and embrace the pure, potent power of nature.
Detailed FAQs
1. Can I use regular table salt for a DIY face scrub?
Generally, no. Regular table salt is often too coarse and jagged, which can easily cause micro-tears and irritation on the delicate skin of your face. If you want to use salt, make sure it’s very fine sea salt or ground it to a powder before use. Even then, it’s often better to stick with sugar for the face, as sugar particles are smoother and less likely to cause damage.
2. How often should I use a DIY face scrub?
The golden rule is 1-2 times a week. Over-exfoliation is a real and common problem. It can strip your skin of its protective barrier, leading to redness, irritation, and breakouts. Listen to your skin; if it feels tight or looks red, dial it back.
3. Do I need to moisturize after exfoliating?
Yes, absolutely. Exfoliation removes the outer layer of dead skin cells, which can temporarily leave your skin feeling a bit stripped. Following up with a good moisturizer is crucial to lock in hydration, soothe your skin, and keep that fresh new layer of skin healthy and protected.
4. Can I use lemon juice in a face scrub?
You can, but with caution. Lemon juice is a powerful natural astringent and contains citric acid (an AHA). It’s great for oily and acne-prone skin but can be very irritating for sensitive skin. The most important thing to remember is that lemon juice makes your skin photosensitive, meaning it’s far more likely to burn in the sun. Always use this scrub in the evening and apply sunscreen religiously the next day.
5. Is it safe to use a coffee scrub on my face?
Yes, coffee grounds can be a great physical exfoliant, especially for combination skin. They help absorb excess oil and can brighten dull skin. Just make sure they are dry grounds (used coffee grounds are perfect) and that you mix them with a moisturizing agent like coconut oil or yogurt to help them glide smoothly.
6. Why is my homemade face scrub growing mold or smelling bad?
Because your DIY scrub doesn’t contain any preservatives, it’s susceptible to bacterial and fungal growth. Water in particular is a breeding ground for microbes. Always store your scrub in the refrigerator and aim to use it within a week. Never use a scrub that smells off or has changed color.
7. How can I make my DIY face scrub gentler for sensitive skin?
First, swap out any granular exfoliants like sugar or coffee for a fine powder like oatmeal, rice flour, or gram flour. Second, add soothing and hydrating ingredients like plain yogurt, honey, and a drop of jojoba or olive oil. Finally, reduce the scrubbing time to just 30-60 seconds and use extremely light pressure.
8. Can DIY face scrubs help with acne?
Yes, they can help prevent and manage acne. Exfoliation helps keep pores clear of dead skin cells and sebum, which are the leading causes of non-inflammatory acne (blackheads and whiteheads). Ingredients like honey (antibacterial), yogurt (lactic acid), and lemon (astringent) are particularly beneficial for acne-prone skin. However, avoid scrubbing actively inflamed pimples, as this can spread bacteria and worsen inflammation.
Sources
-
Pulse Nigeria, “5 DIY exfoliator for your facial skin,”
-
India Today, “7 homemade face scrubs for naturally glowing and healthy skin,”
-
TheSoapery, “DIY Face Exfoliator Recipe,”
-
Necole Bitchie, “How to Make a Face Scrub Exfoliator at Home?”
-
DNA India, “Prajakta Koli’s Go-To Skincare,”
-
The Inquisitive Enthusiast, “Homemade Face Scrub Recipes,”
-
Myntra Blog, “5 DIY Homemade Face Scrub Recipes,”
-
Tata 1mg Capsules, “5 best DIY face scrubs for dry skin,”
Tags:
Exfoliator for Face DIY
admin
M Umer Abbasi is a luxury lifestyle journalist and editorial curator specializing in haute horology, passion investments, and avant-garde design. With an eye for flawless craftsmanship and heritage storytelling, he deconstructs the world of high-ticket assets—from secondary watch market trends to the evolution of bespoke tailoring. His work focuses on shifting the luxury narrative away from fleeting trends and toward timeless design, raw materials, and true artisanship.